初次发布于我的个人文档。(每次都是个人文档优先发布哦)
本期是基于我刚刚完成的SmartCanvas项目简要介绍一下如何在Windows上部署kafka。
值得一提的是,kafka是一个大数据场景下常用的分布式基于消息订阅模型的开源流处理平台,在SmartCanvas中当做消息队列使用。
注意看他的定位,大数据场景、分布式等词,其实意味着kafka需要依托于服务器集群环境,所以他正常的操作还是安装在linux集群上,本文在Windows上安装只是安装一个单机的开发时测试用的kafka。
1.下载kafka安装包
前往kafka官网下载,
本文选择的是 kafka_2.13-3.9.0.tgz,只需要下载3.9.0
Binary downloads:
选择下面那个就可以了。
这里简单说明一下
Supported releases 支持版本
3.9.0
-
Released November 6, 2024
发布于 2024 年 11 月 6 日
-
Release Notes 发布说明
-
Docker image: apache/kafka:3.9.0.
Docker 镜像:apache/kafka:3.9.0.
-
Docker Native image: apache/kafka-native:3.9.0.
Docker 原生镜像:apache/kafka-native:3.9.0.
-
Source download: kafka-3.9.0-src.tgz (asc, sha512)
源代码下载:kafka-3.9.0-src.tgz (asc, sha512)
-
Binary downloads:
二进制下载:
We build for multiple versions of Scala. This only matters if you are using Scala and you want a version built for the same Scala version you use. Otherwise, any version should work (2.13 is recommended).
我们为多个版本的 Scala 进行构建。这只有在您使用 Scala 并且希望使用与您使用的相同 Scala 版本构建的版本时才重要。否则,任何版本都应该可以工作(推荐使用 2.13)。
kafka 3.9.0在官网上是的这样的,
额,下面的中文官网是没有的,是已经翻译之后的。
kafka提供了三种下载方式,通过docker镜像可以一键安装部署。
通过源代码下载,你将获得kafka的源代码,你可以自行编译。
下面的二进制下载则是打包后能直接运行的应用程序,我们这次就是选择的这个方式。
但是你会看到二进制下载有两种,什么2.12 2.13之类的。
这是scala的版本,kafka是基于scala构建的所以这里有不同版本的scala编译的程序。
虽然kafka是基于scala构建的,但scala和kotlin类似也是一门jvm语言,所以你运行的话只需要准备java环境就可以了不需要下载scala。
总结:下载kafka安装包,准备java运行环境即可。
2.解压
额,就是字面意思,解压压缩包就可以了。
Windows不用教了吧,下个什么7-zip,bandizip之类的解压就可以了。
linux命令也不难,
1
|
tar -zxvf 压缩包目录 -C 解压目录
|
解压完我个人的习惯是把解压目录改名成kafka,这个随意不是必须做的。
3.进行配置
我这次选择在Windows上部署kafka,主流方式是部署在linux上啦,其实都一样的。
但是部署在linux上一般不需要进行下面的配置:
先建一个文件夹用来存放kafka的日志。
然后进入kafka\config用vim或记事本打开里面的server.properties。
找到62行
log.dirs=/tmp/kafka-logs
这是日志文件的地址,很显然这不是Windows文件系统应该有的地址。
现在换成你刚刚建的文件夹的位置。
但是注意,要把路径的单斜杠\重复一遍进行转义,即把\换成 \\
接下来的步骤,不管部署在Windows还是linux上都要进行处理。
找到34行
listeners=PLAINTEXT://:9092
这是是kafka的地址,改成
1
|
listeners=PLAINTEXT://localhost:9092
|
这样kafka就会监听本地9092端口了。
这是我配置完之后的配置文件,可以给你参考。
  1
  2
  3
  4
  5
  6
  7
  8
  9
 10
 11
 12
 13
 14
 15
 16
 17
 18
 19
 20
 21
 22
 23
 24
 25
 26
 27
 28
 29
 30
 31
 32
 33
 34
 35
 36
 37
 38
 39
 40
 41
 42
 43
 44
 45
 46
 47
 48
 49
 50
 51
 52
 53
 54
 55
 56
 57
 58
 59
 60
 61
 62
 63
 64
 65
 66
 67
 68
 69
 70
 71
 72
 73
 74
 75
 76
 77
 78
 79
 80
 81
 82
 83
 84
 85
 86
 87
 88
 89
 90
 91
 92
 93
 94
 95
 96
 97
 98
 99
100
101
102
103
104
105
106
107
108
109
110
111
112
113
114
115
116
117
118
119
120
121
122
123
124
125
126
127
128
129
130
131
132
133
134
135
136
137
138
139
|
# Licensed to the Apache Software Foundation (ASF) under one or more
# contributor license agreements.  See the NOTICE file distributed with
# this work for additional information regarding copyright ownership.
# The ASF licenses this file to You under the Apache License, Version 2.0
# (the "License"); you may not use this file except in compliance with
# the License.  You may obtain a copy of the License at
#
#    http://www.apache.org/licenses/LICENSE-2.0
#
# Unless required by applicable law or agreed to in writing, software
# distributed under the License is distributed on an "AS IS" BASIS,
# WITHOUT WARRANTIES OR CONDITIONS OF ANY KIND, either express or implied.
# See the License for the specific language governing permissions and
# limitations under the License.

#
# This configuration file is intended for use in ZK-based mode, where Apache ZooKeeper is required.
# See kafka.server.KafkaConfig for additional details and defaults
#

############################# Server Basics #############################

# The id of the broker. This must be set to a unique integer for each broker.
broker.id=0

############################# Socket Server Settings #############################

# The address the socket server listens on. If not configured, the host name will be equal to the value of
# java.net.InetAddress.getCanonicalHostName(), with PLAINTEXT listener name, and port 9092.
#   FORMAT:
#     listeners = listener_name://host_name:port
#   EXAMPLE:
#     listeners = PLAINTEXT://your.host.name:9092
#listeners=PLAINTEXT://:9092
listeners=PLAINTEXT://localhost:9092

# Listener name, hostname and port the broker will advertise to clients.
# If not set, it uses the value for "listeners".
#advertised.listeners=PLAINTEXT://your.host.name:9092

# Maps listener names to security protocols, the default is for them to be the same. See the config documentation for more details
#listener.security.protocol.map=PLAINTEXT:PLAINTEXT,SSL:SSL,SASL_PLAINTEXT:SASL_PLAINTEXT,SASL_SSL:SASL_SSL

# The number of threads that the server uses for receiving requests from the network and sending responses to the network
num.network.threads=3

# The number of threads that the server uses for processing requests, which may include disk I/O
num.io.threads=8

# The send buffer (SO_SNDBUF) used by the socket server
socket.send.buffer.bytes=102400

# The receive buffer (SO_RCVBUF) used by the socket server
socket.receive.buffer.bytes=102400

# The maximum size of a request that the socket server will accept (protection against OOM)
socket.request.max.bytes=104857600


############################# Log Basics #############################

# A comma separated list of directories under which to store log files
log.dirs=D:\\softwareLocate\\kafka\\logs

# The default number of log partitions per topic. More partitions allow greater
# parallelism for consumption, but this will also result in more files across
# the brokers.
num.partitions=1

# The number of threads per data directory to be used for log recovery at startup and flushing at shutdown.
# This value is recommended to be increased for installations with data dirs located in RAID array.
num.recovery.threads.per.data.dir=1

############################# Internal Topic Settings  #############################
# The replication factor for the group metadata internal topics "__consumer_offsets" and "__transaction_state"
# For anything other than development testing, a value greater than 1 is recommended to ensure availability such as 3.
offsets.topic.replication.factor=1
transaction.state.log.replication.factor=1
transaction.state.log.min.isr=1

############################# Log Flush Policy #############################

# Messages are immediately written to the filesystem but by default we only fsync() to sync
# the OS cache lazily. The following configurations control the flush of data to disk.
# There are a few important trade-offs here:
#    1. Durability: Unflushed data may be lost if you are not using replication.
#    2. Latency: Very large flush intervals may lead to latency spikes when the flush does occur as there will be a lot of data to flush.
#    3. Throughput: The flush is generally the most expensive operation, and a small flush interval may lead to excessive seeks.
# The settings below allow one to configure the flush policy to flush data after a period of time or
# every N messages (or both). This can be done globally and overridden on a per-topic basis.

# The number of messages to accept before forcing a flush of data to disk
#log.flush.interval.messages=10000

# The maximum amount of time a message can sit in a log before we force a flush
#log.flush.interval.ms=1000

############################# Log Retention Policy #############################

# The following configurations control the disposal of log segments. The policy can
# be set to delete segments after a period of time, or after a given size has accumulated.
# A segment will be deleted whenever *either* of these criteria are met. Deletion always happens
# from the end of the log.

# The minimum age of a log file to be eligible for deletion due to age
log.retention.hours=168

# A size-based retention policy for logs. Segments are pruned from the log unless the remaining
# segments drop below log.retention.bytes. Functions independently of log.retention.hours.
#log.retention.bytes=1073741824

# The maximum size of a log segment file. When this size is reached a new log segment will be created.
#log.segment.bytes=1073741824

# The interval at which log segments are checked to see if they can be deleted according
# to the retention policies
log.retention.check.interval.ms=300000

############################# Zookeeper #############################

# Zookeeper connection string (see zookeeper docs for details).
# This is a comma separated host:port pairs, each corresponding to a zk
# server. e.g. "127.0.0.1:3000,127.0.0.1:3001,127.0.0.1:3002".
# You can also append an optional chroot string to the urls to specify the
# root directory for all kafka znodes.
zookeeper.connect=localhost:2181

# Timeout in ms for connecting to zookeeper
zookeeper.connection.timeout.ms=18000


############################# Group Coordinator Settings #############################

# The following configuration specifies the time, in milliseconds, that the GroupCoordinator will delay the initial consumer rebalance.
# The rebalance will be further delayed by the value of group.initial.rebalance.delay.ms as new members join the group, up to a maximum of max.poll.interval.ms.
# The default value for this is 3 seconds.
# We override this to 0 here as it makes for a better out-of-the-box experience for development and testing.
# However, in production environments the default value of 3 seconds is more suitable as this will help to avoid unnecessary, and potentially expensive, rebalances during application startup.
group.initial.rebalance.delay.ms=0
|
4.安装zookeeper
接下来,似乎可以直接启动kafka了,但是你想得美嘞。
再次重复一下kafka的地位,大数据场景下常用的分布式基于消息订阅模型的开源流处理平台,
这意味着kafka需要zookeeper提供分布式协调服务,协调各个kafka集群中的机器,虽然我们只是在安装单机开发测试服务器,但是zookeeper还是少不了。
前往zookeeper官网,下载安装包,你划到下面就可以看到
Download
Apache ZooKeeper 3.9.3 is our current release, and 3.8.4 our latest stable release.
Apache ZooKeeper 3.9.3
Apache ZooKeeper 3.9.3(asc, sha512)
Apache ZooKeeper 3.9.3 Source Release(asc, sha512)
在这里,我选择下载zookeeper 3.9.3
点击Apache ZooKeeper 3.9.3(asc, sha512)这个链接就可以了。
We suggest the following location for your download:
https://dlcdn.apache.org/zookeeper/zookeeper-3.9.3/apache-zookeeper-3.9.3-bin.tar.gz
Alternate download locations are suggested below.
It is essential that you verify the integrity of the downloaded file using the PGP signature ( .asc file) or a hash ( .md5 or .sha* file).
然后你会看到这样的页面,点击上面的链接,https://dlcdn.apache.org/zookeeper/zookeeper-3.9.3/apache-zookeeper-3.9.3-bin.tar.gz就可以下载到zookeeper安装包了。
然后找个地方解压就可以了。
再对zookeeper进行配置,应该轻车熟路了。
进入zookeeper\conf找到zoo.cfg用vim或记事本打开,
直接给你看我的配置文件,
 1
 2
 3
 4
 5
 6
 7
 8
 9
10
11
12
13
14
15
16
17
18
19
20
21
22
23
24
25
26
27
28
29
30
31
32
33
34
35
36
37
|
# The number of milliseconds of each tick
tickTime=2000
# The number of ticks that the initial
# synchronization phase can take
initLimit=10
# The number of ticks that can pass between
# sending a request and getting an acknowledgement
syncLimit=5
# the directory where the snapshot is stored.
# do not use /tmp for storage, /tmp here is just
# example sakes.
dataDir=D:\\softwareLocate\\zookeeper\\data
dataLogDir=D:\\softwareLocate\\zookeeper\\log
# the port at which the clients will connect
clientPort=2181
# the maximum number of client connections.
# increase this if you need to handle more clients
#maxClientCnxns=60
#
# Be sure to read the maintenance section of the
# administrator guide before turning on autopurge.
#
# https://zookeeper.apache.org/doc/current/zookeeperAdmin.html#sc_maintenance
#
# The number of snapshots to retain in dataDir
#autopurge.snapRetainCount=3
# Purge task interval in hours
# Set to "0" to disable auto purge feature
#autopurge.purgeInterval=1

## Metrics Providers
#
# https://prometheus.io Metrics Exporter
#metricsProvider.className=org.apache.zookeeper.metrics.prometheus.PrometheusMetricsProvider
#metricsProvider.httpHost=0.0.0.0
#metricsProvider.httpPort=7000
#metricsProvider.exportJvmInfo=true
|
你要配置的是12和13行,配置zookeeper数据文件夹和zookeeper日志文件夹,找个地方新建出这两个文件夹然后把路径换成你自己的即可。
dataDir=D:\\softwareLocate\\zookeeper\\data
dataLogDir=D:\\softwareLocate\\zookeeper\\log
5.启动zookeeper
接下来,我们终于可以启动zookeeper和kafka了。
我们要先启动zookeeper。
进入zookeeper\bin文件夹,找到zkServer.cmd(对linux系统,找到zkServer.sh),然后打开cmd等终端。
如果你不知道怎么打开终端的话,对linux你还能不知道也是神人了。
对于Windows系统,你去文件资源管理器的地址栏,输入cmd回车即可。
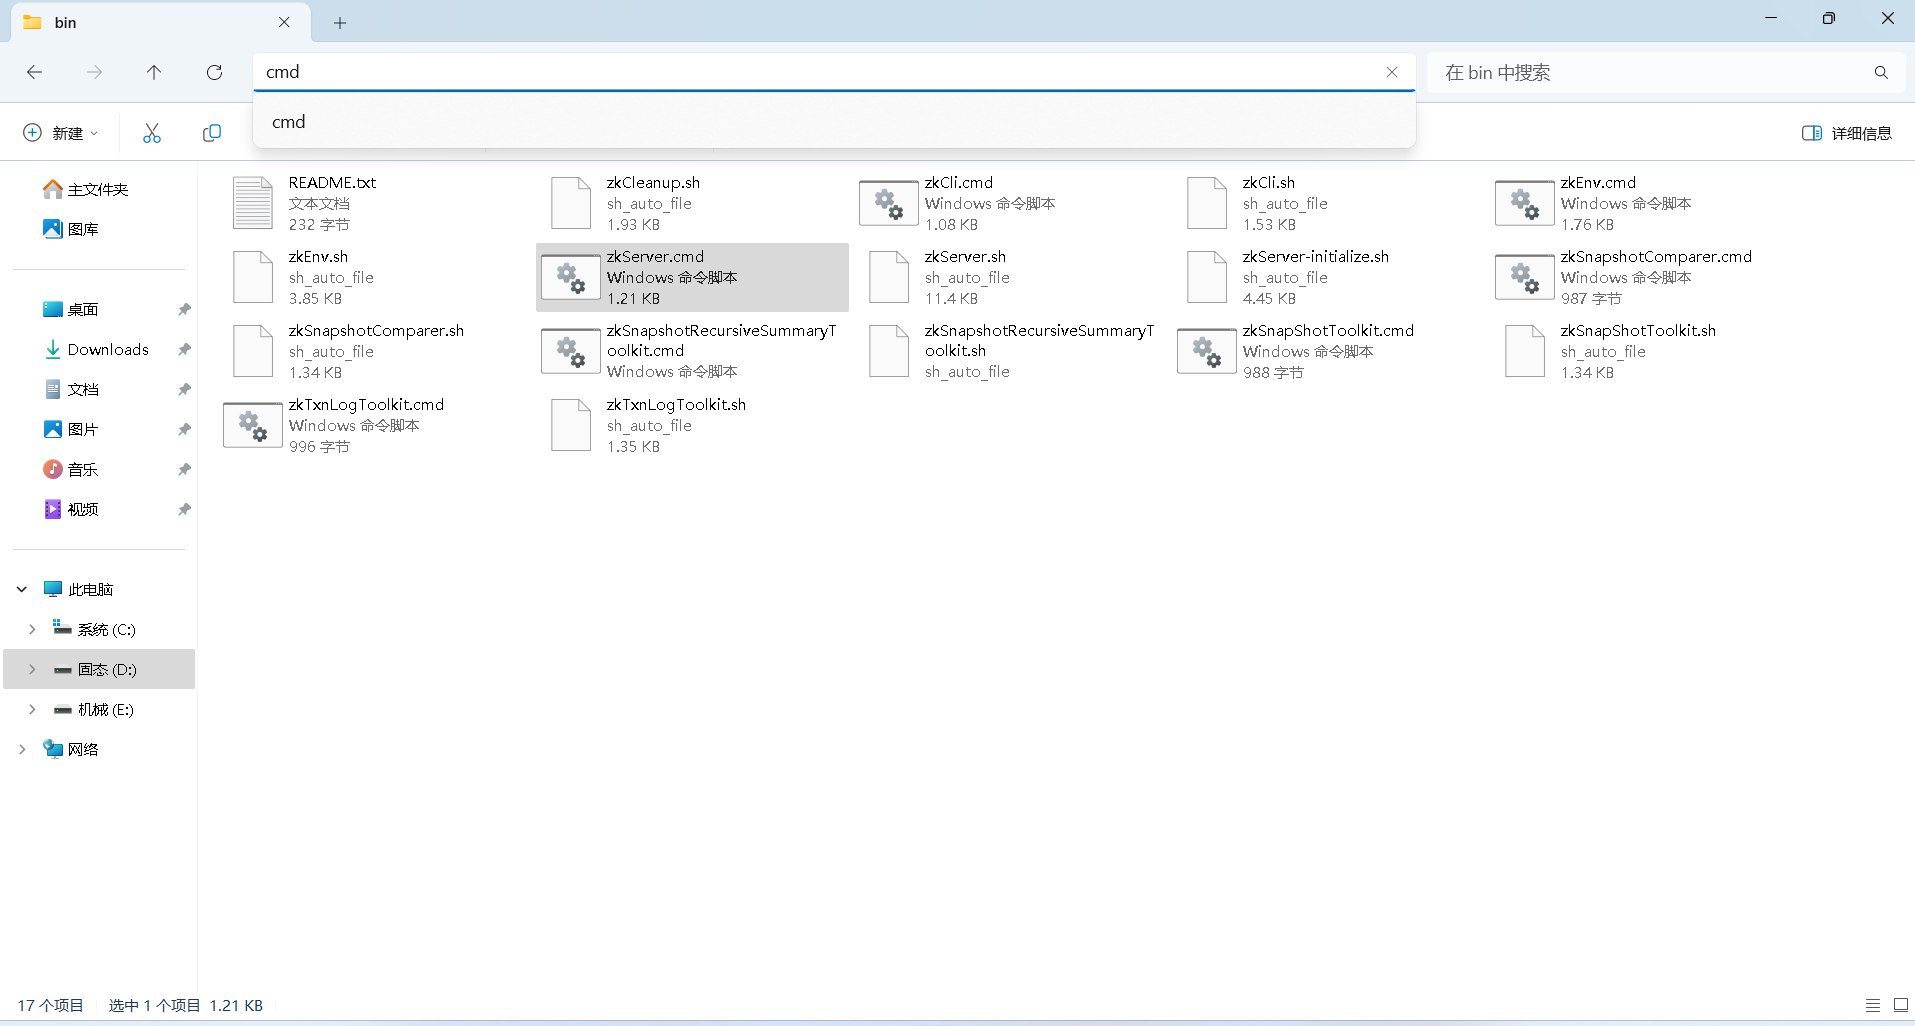
在终端中输入zkServer.cmd的文件名再按回车
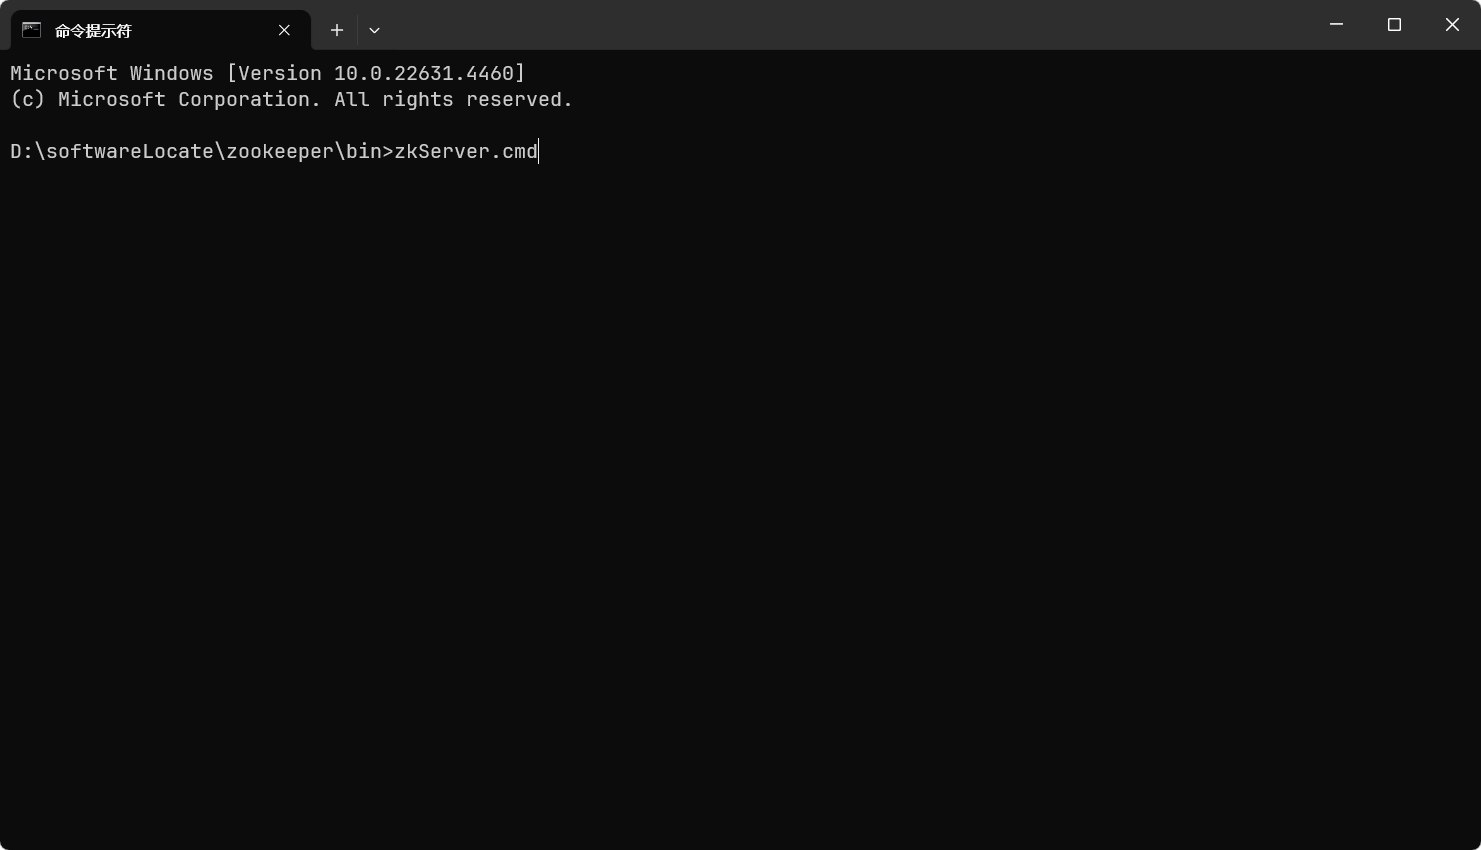
就可以启动zookeeper了。
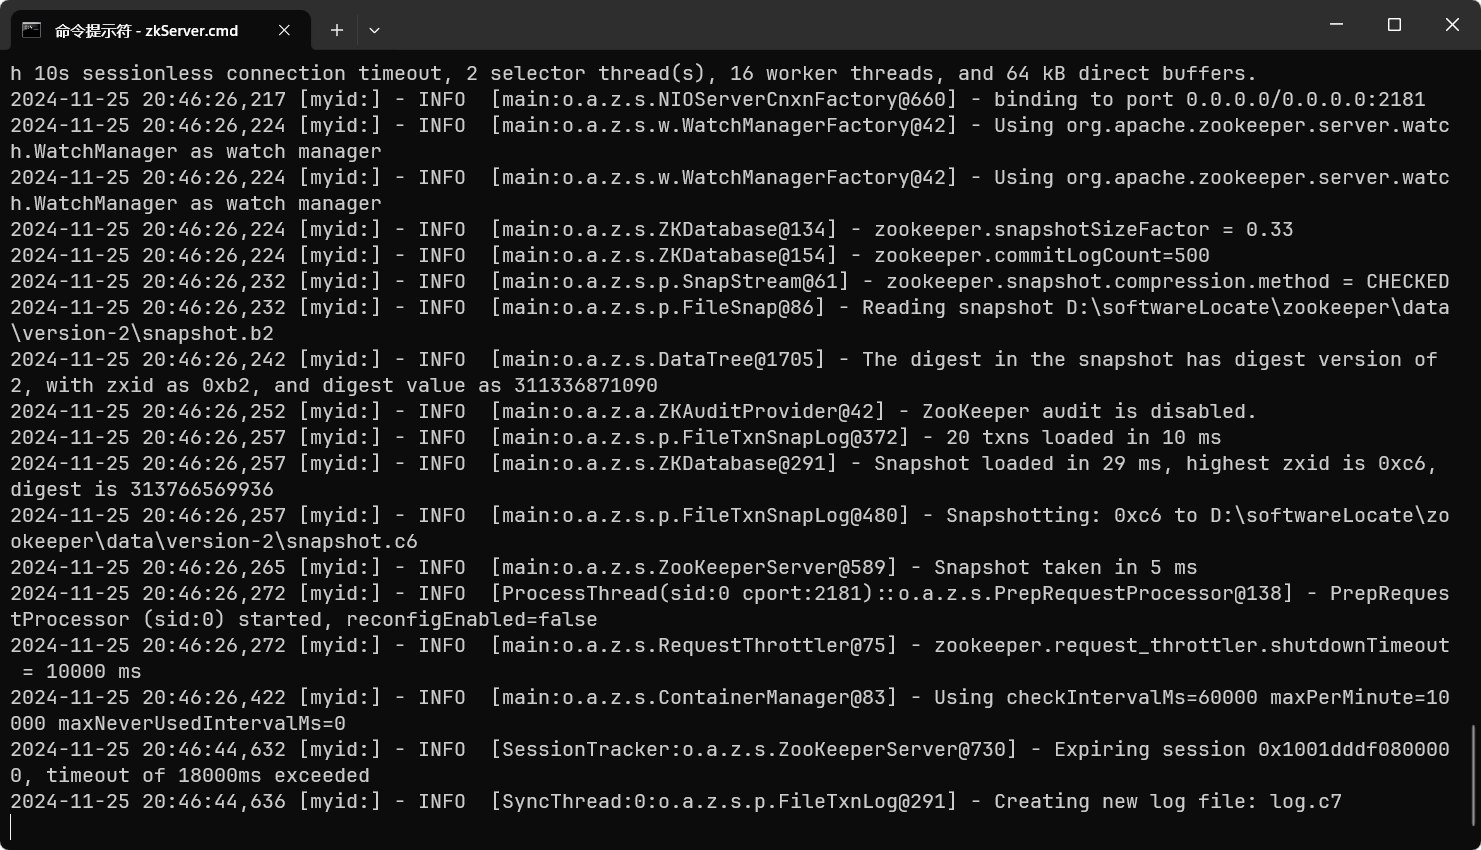
6.启动kafka
然后我们来启动kafka。
启动kafka就是启动
kafka\bin\windows\kafka-server-start.bat
但是我们还得指定刚刚设置的配置文件,所以我的建议是你去kafka\bin目录,打开cmd输入
1
|
bin\windows\kafka-server-start.bat config\server.properties
|
并按回车。
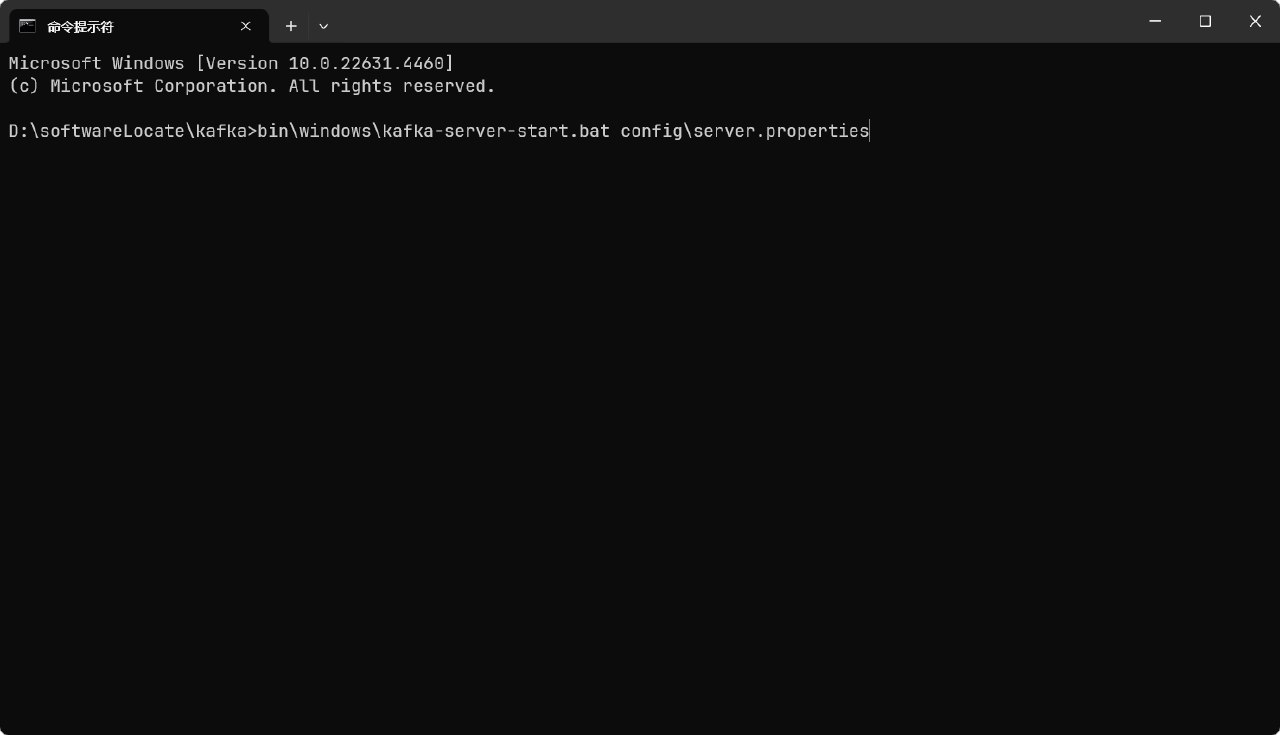
解析一下这个命令,命令的前一半是指定到了当前目录下的bin目录下的windows里面的kafka-server-start.bat文件。
后一半类似,指定了我们刚刚书写的配置文件。
只需要稍等片刻,kafka就会启动完成了。
7.跑一个小demo
这里我选择复用smartCanvas项目的代码,
由于这是一个spring boot项目所以这里选择使用spring-kafka来操作kafka。
首先安装依赖:
1
2
3
4
|
        <dependency>
            <groupId>org.springframework.kafka</groupId>
            <artifactId>spring-kafka</artifactId>
        </dependency>
|
然后前往application.yml进行设置。例如:
 1
 2
 3
 4
 5
 6
 7
 8
 9
10
11
12
|
spring:
  kafka:
    bootstrap-servers: "kafka服务器地址"
    producer:
    # 消息生产者key和value序列化器,这里是字符串序列化器
      key-serializer: org.apache.kafka.common.serialization.StringSerializer
      value-serializer: org.apache.kafka.common.serialization.StringSerializer
    # 类似地,这里是消费者key和value序列化器
    consumer:
      key-deserializer: org.apache.kafka.common.serialization.StringDeserializer
      value-deserializer: org.apache.kafka.common.serialization.StringDeserializer
      group-id: "使用者组名称"
|
然后在消息生产者处注入kafkaTemplate操作kafka。
1
2
|
    @Resource
    private KafkaTemplate<String, String> kafkaTemplate;
|
然后将消息发送出去。
1
|
kafkaTemplate.send("smartCanvas_genChartByAI", JSONUtil.toJsonStr(chart));
|
这里的"smartCanvas_genChartByAI"是kafka中的话题(topic)的名称。
JSONUtil.toJsonStr(chart)是一个字符串,这个就是消息生产者产生的消息。
消息生产者代码示例:
 1
 2
 3
 4
 5
 6
 7
 8
 9
10
11
12
13
14
15
16
17
18
19
20
21
22
23
24
25
26
27
28
29
30
31
32
33
34
35
36
37
38
39
40
41
42
43
44
45
46
47
48
49
50
51
52
|
    @Resource
    private ChartService chartService; //接口依赖的其他服务

    @Resource
    private UserService userService; //接口依赖的其他服务

    @Resource
    private AiService aiService; //接口依赖的其他服务

    @Resource
    private RedissonUtils redissonUtils; //接口依赖的其他服务

    @Resource
    private KafkaTemplate<String, String> kafkaTemplate;

    /**
     * 智能分析(异步)
     *
     * @param file       上传的文件
     * @param requestDTO 智能分析请求
     * @param request    请求
     * @return 智能分析结果
     */
    @PostMapping("/gen/async")
    public BaseResponse<GenResultVO> genChartAsyncByAi(@RequestPart("file") MultipartFile file,
                                                       GenChartByAiRequest requestDTO, HttpServletRequest request) {
        chartService.validGenChartParams(file, requestDTO);

        User user = userService.getLoginUser(request);
        try {
            redissonUtils.limitRate("smartCanvas_genChartByAI_async_" + user.getId(), 2L);
        } catch (BusinessException e) {
            throw new BusinessException(ErrorCode.TOO_MANY_REQUESTS_ERROR, "请求过于频繁,请稍后再试");
        }
        String data = ExcelUtils.excelToCsv(file);

        Chart chart = Chart.builder()
                .chartData(data)
                .chartName(requestDTO.getChartName())
                .chartType(requestDTO.getChartType())
                .goal(requestDTO.getGoal())
                .createrId(user.getId())
                .status(ChartStatusEnums.PROCESSING.getValue())
                .execmsg(ChartStatusEnums.PROCESSING.getDesc())
                .build();

        chartService.save(chart);

        //提交给kafka消息队列
        kafkaTemplate.send("smartCanvas_genChartByAI", JSONUtil.toJsonStr(chart));
        return ResultUtils.success(new GenResultVO(null, "", "{}", ChartStatusEnums.PROCESSING.getValue(), ChartStatusEnums.PROCESSING.getDesc()));
    }
|
然后是消息的消费者,
只需要给消息的消费者方法增加注解@KafkaListener(topics = {"要接受消息的topic名称"})即可。
在smartCanvas中是这样实现的。
 1
 2
 3
 4
 5
 6
 7
 8
 9
10
11
12
13
14
15
16
17
18
19
20
21
22
23
24
25
26
27
28
29
30
31
32
33
34
35
36
37
38
39
40
41
42
43
44
45
46
47
48
49
50
51
52
53
54
55
56
57
58
59
60
61
62
63
64
65
66
67
68
69
70
|
package cn.cola.smartcanvas.service.impl;

import cn.cola.smartcanvas.model.enums.ChartStatusEnums;
import cn.cola.smartcanvas.model.po.Chart;
import cn.cola.smartcanvas.model.vo.GenResultVO;
import cn.cola.smartcanvas.service.AiService;
import cn.cola.smartcanvas.service.ChartService;
import cn.cola.smartcanvas.service.KafkaService;
import cn.hutool.json.JSONUtil;
import lombok.extern.slf4j.Slf4j;
import org.apache.kafka.clients.consumer.ConsumerRecord;
import org.springframework.kafka.annotation.KafkaListener;
import org.springframework.stereotype.Service;

import javax.annotation.Resource;

/**
 * 卡夫卡服务实现类
 *
 * @author ColaBlack
 */
@Service
@Slf4j
public class KafkaServiceImpl implements KafkaService {

    @Resource
    private AiService aiService;

    @Resource
    private ChartService chartService;

    /**
     * 智能分析任务
     *
     * @param record 消息记录
     */
    @Override
    @KafkaListener(topics = {"smartCanvas_genChartByAI"})
    public void genResultTask(ConsumerRecord<String, String> record) {
        if (record == null || record.value() == null) {
            log.error("kafka 中消息记录为空");
            return;
        }
        GenResultVO resultVO;
        Chart chart = JSONUtil.toBean(record.value(), Chart.class);
        String chartData = chart.getChartData();
        String goal = chart.getGoal();
        String chartType = chart.getChartType();
        if (chartType == null) {
            chartType = "任意统计图";
        }
        try {
            resultVO = aiService.genResult(goal, chartType, chartData);
            resultVO.setId(chart.getId());
        } catch (Exception e) {
            log.error("智能分析异常", e);
            chart.setStatus(ChartStatusEnums.FAILED.getValue());
            chart.setExecmsg(ChartStatusEnums.FAILED.getDesc());
            chartService.updateById(chart);
            return;
        }

        chart.setGeneratedChart(resultVO.getOption());
        chart.setAnalyzedResult(resultVO.getResult());

        chart.setStatus(ChartStatusEnums.SUCCESS.getValue());
        chart.setExecmsg(ChartStatusEnums.SUCCESS.getDesc());
        chartService.updateById(chart);
    }
}
|
@Service注解将消息消费者注册为spring bean,然后genResultTask就是真正的处理消息的方法。
ConsumerRecord<String, String> record的record的value就是消息生产者产生的消息了。
在smartCanvas项目里,是通过将消息反序列化为java对象再进行下一步业务逻辑处理的。
1
|
Chart chart = JSONUtil.toBean(record.value(), Chart.class);
|